Uncategorized

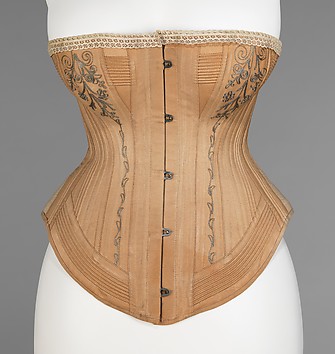
The Athletic Corset pattern

C1890-1900 THE ATHLETIC CORSET: PART 1

NOTE  *This article was originally published January 2017 for Foundations Revealed. The link can be found here.

This is the first part in a two part series discussing ‘The Athletic Corset’ pattern as featured in ‘A practical guide to corset cutting and making’ compiled by William D.F. Vincent. (More about this book here.) This article will discuss the pattern and how I have interpreted it whereas the second will focus on recreating the corset and my methods used in its construction.

As someone active  in various sports I was intrigued by the corset and its fit considering its purpose. Perhaps I could test it out to see how viable it is to wear as a functioning garment whilst playing sports?

I haven’t used elastic/ stretch fabrics before in ‘true’ corsetry (excluding contemporary  lingerie/basque making) so it would be interesting to see if there were any benefits to the fabric properties, and whether this would enhance freedom of movement during sporting activities.

The Pattern and Observations

The Athletic Corset pattern

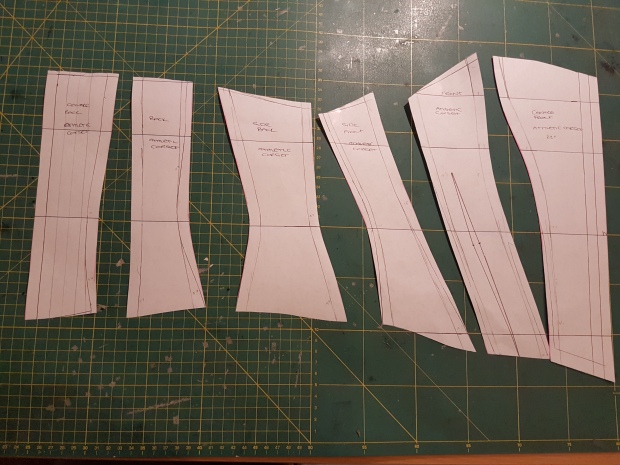
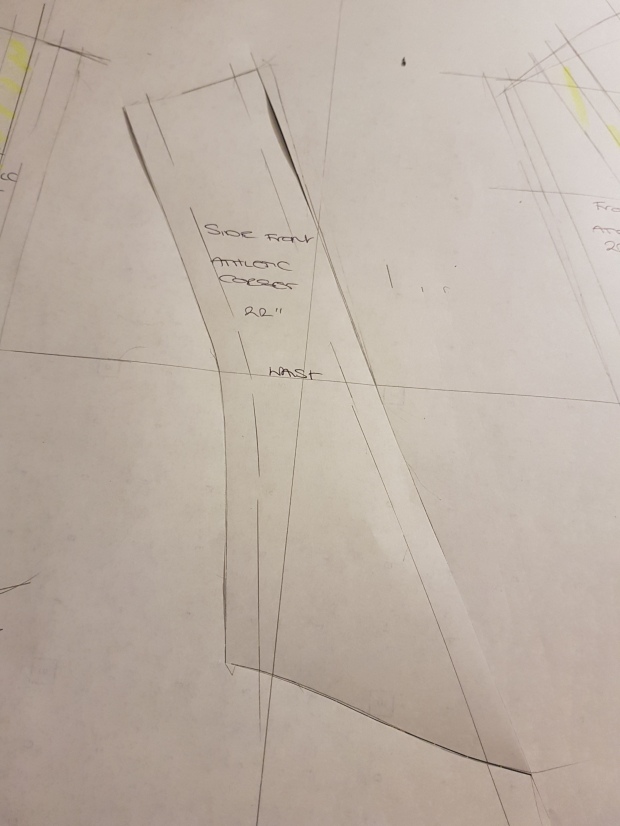
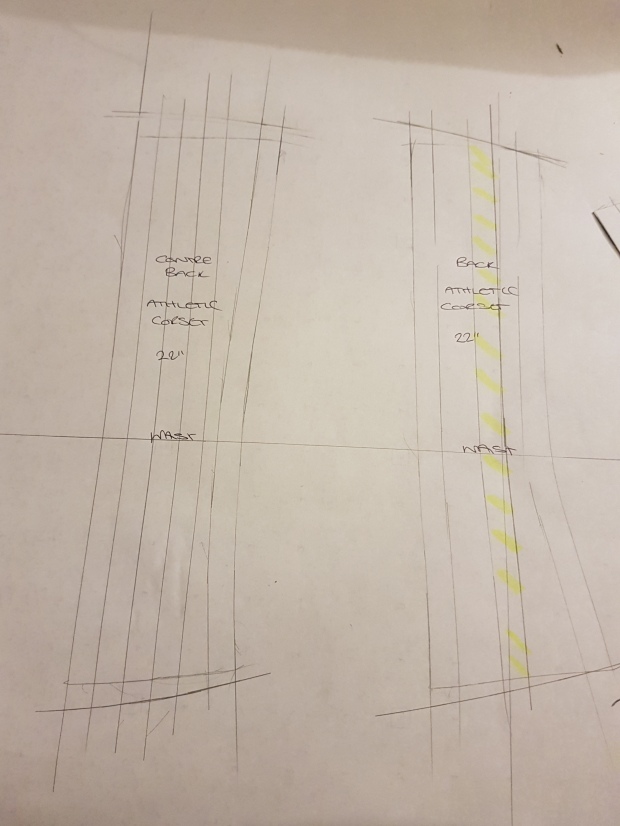
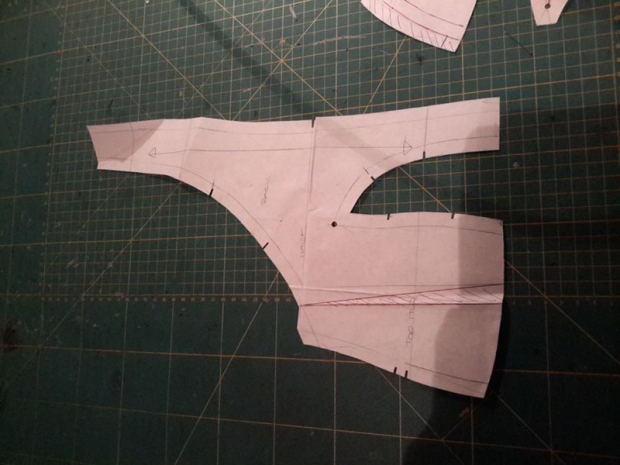
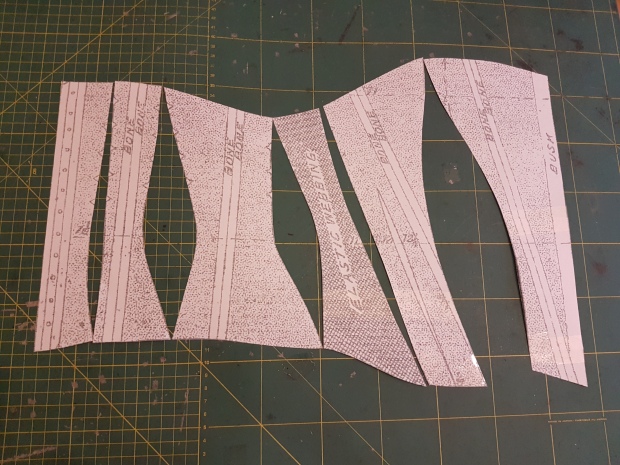
  • The pattern was constructed in 12 pieces, 6 panels per side. I will rename as follows for the remainder of the article: Working right to left, Centre Front, Front, Side Front, Side Back, Back, Centre Back.
  • Centre Front – features a 2 part opening straight busk. According to the measurements on the scaled pattern the centre front should measure roughly 10.5 inches (27cm). A double bone is positioned in the centre of the piece. (A wide single casing is used, but stitched to create two channels.)
  • Front – Double bone running into the CF/F seam. Small shaped dart extending from the hem for additional shaping to the front panel.
  • Side Front (Elastic Webbing) – runs the length of the garment. Used to promote ‘freedom of movement’.
  • Side Back – wide panel with a double bone positioned in the centre of the panel. Quite a lot of shaping shown for the hip.
  • Back – features a double bone positioned in the centre of the panel. No indication of being on the inside or the outside of the garment.
  • Centre Back – Has twelve pairs of eyelets at the back for lacing, with a bone on ether side.

Looking at the pattern, it can be noted that there is only a small reduction to the waist area overall, presumably to allow the wearer some freedom of movement during wear. Although there is shaping over the bust and hip area, the seams are relatively flat in comparison to other corset styles that would create a fashionable, narrow-waisted silhouette when worn. Even with the additional bone channels, the garment is only lightly structured considering the small number of panels on each side. There is no indication of the construction methods used, but I am going to assume that bone channels were created in the seams joining the panels for extra bones.  Whilst making the corset I will decide whether the additional bone channels were placed internally or applied to the exterior of the corset.

Having only the diagram of the pattern to refer to, I knew little else about the corset, particularly the date. The book in which it appears could have been compiled as late as the 1920’s, and features styles typical of times significantly before its publication. Although I could guess, I preferred to do some further research into sports corsetry, looking at advertisements and publications to try to anchor this style to a rough date.


History

The reinvention of the ancient Olympic games in Athens in 1896 had a huge affect on how society viewed physical activity and the impact it had on dress and fashion. Sports provided an opportunity for the sexes to interact, and generated the beginnings of competitiveness amongst men and women. “Women were now participating in various games, tennis, cycling, skiing skating and soon began to eliminate pieces of their clothing that for daytime wear made their daily lives more efficient” (Doyle). Whilst corsets were still an integral part of women’s dress, they were being manufactured with a lighter, less structured mindset and with less coverage of the body to promote freedom of movement for sporting activities. For the first time, fashion books and magazines promoted diet, exercise and proper foundations. Corset companies advertised the sports corset and its benefits to the weathy lady of leisure.

Corsets were adapted, many featuring bust sections that were cut low under the arm, allowing the wearer full ease of movement over the upper body. Riding styles were cut high on the hip to provide comfort when in the saddle. Invented in 1820, elastic panels (trademarked ‘Lastex’ in 1931 for strips of rubber covered with silk, cotton, wool or rayon to form a yarn) wasn’t favoured in corsetry until the 1890s, when it was introduced into the popular new riding and sports corsets styles.

As women entered the work force during the First World War, factories and workplaces imposed strict regulations governing dress while working. The traditional rigid boned corset was slowly disappearing in favour of lighter support and freedom of movement. Most women from the 1920’s still wore some kind of corset, corselette or girdle (Steele), often utilising the elastic panel webbing for support and control.


Ferris Bros. Corsets, New York

Sherwood B Ferris and his brother Murray Whiting Ferris established the Ferris Bros. Company in 1878. Known best as the manufacturers behind the ‘Ferris Good Sense corset’, theirs were considered healthier than the traditional corset for girls and young women who were not cinching the waistline too tightly.

The Good Sense range also advertised bicycle and athletic corsets for the eager sporting woman. These corsets supposedly gave the body ‘healthful and graceful full support’. Advertisements published by Ferris Bros. give us a really clear insight into the corsets’ intended purpose, being especially designed for women who enjoy healthful exercise.  ‘An indispensable garment for the woman who rides a wheel, plays golf or tennis, rows a boat or climbs a mountain’. From looking at these advertisements I decided to date the corset pattern somewhere between the latter part of the 1890’s and the early 1900’s. Although I looked at many, these two seem to reflect our pattern the most closely.
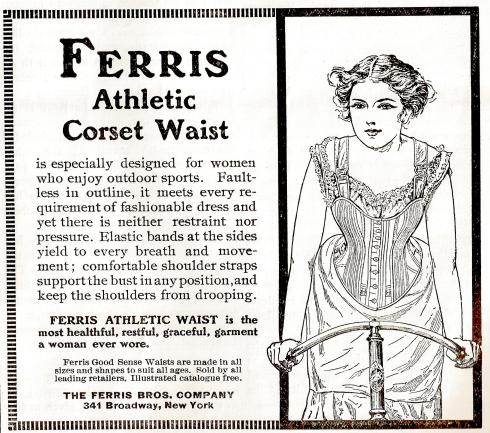
Ferris Athletic corset waist advert


“Ferris Athletic Corset Waist is especially designed for women who enjoy outdoor sports. Faultless in outline, it meets every requirement of fashionable dress and yet there is neither restraint nor pressure. Elastic bands at the sides yield to every breath and movement; comfortable shoulder straps support the bust in any position and keep the shoulders from drooping.

FERRIS ATHLETIC WAIST is the most healthful, restful, graceful, garment a woman ever wore.”
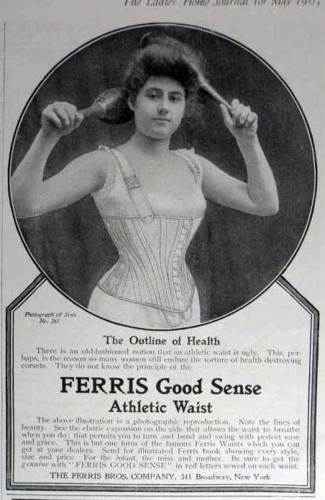
Ferris Bros corset advert 1903-good sense athletic waist Ferris

“The Outline of Health – There is an old fashioned notion that an athletic waist is ugly. This perhaps is the reason so many woman still embrace the torture of health destroying corsets. They do not know the principles of the FERRIS GOOD SENSE ATHLETIC WAIST.

The above illustration is a photographic reproduction. Note the lines of beauty. See the elastic expansion on the side that allows the waist to breathe when you do, that permits you to turn and bend and swing with perfect ease and grace.”


Pattern Planning Stages

My initial approach to the corset draft was to scale up the pattern to life size and use it as a block, amending as necessary to my own measurements. Looking at the centre back depth from my printout, I used my home printer to scale the pattern up by 170% as a rough starting point. Ten minutes and some cutting and sticking later, I had my basic block to work from.
4

Measurements

  • Overbust: 76cm
  • Underbust: 67cm
  • Waist: 62cm
  • Top hip: 71cm
  • Full hip: 84 cm
  • Over bust to underbust: 5.5cm
  • Overbust to waist: 14cm
  • Point of bust (POB to POB) 19cm
  • Waist to top hip: 10cm
  • Waist to full hip: 20cm

I then made a table to work out my corseted measurements. I decided to work with with a 3″ reduction throughout the corset pattern. (2″ for the lacing gap and the then a further 1″ to provide minimal cinching to the waist. Referring to the corset pattern sketch showed quite minimal shaping.


Natural Reduction Corseted
Bust 76cm 7.5cm 68.5cm
Underbust 67cm 7.5cm 59.5cm
Waist 62cm 7.5cm 54.5cm
Top Hip 71cm 7.5cm 63.5cm
Full Hip 84cm 7.5cm 76.5cm


I would now work with the block as a net pattern (no seam allowances.) Comparing my measurements to the block’s overbust to waist depth measurements, I found that I wouldn’t need to reduce or lengthen the corset in this area. I made a table to compare my own measurements to those of the block to see the differences and identify where the pattern would be amended.


Block 1/2 my desired measurements
Difference
Bust 44cm 34.25cm -9.75cm
Underbust 37.9cm 29.75cm -8.15cm
Waist 30.9cm 27.1cm -3.80cm
Top Hip 40.75cm 31.75cm -9cm
Full Hip N/A N/A N/A


  • I would take a lot from the bust and hip measurements in comparison to the waist.
  • I would take more from the front overbust area than the back, reducing the bust capacity, as I have a a petite frame and this area will gape.
  • I would take out though the side back panel as this was the widest panel for the hip measurement, reducing capacity.
  • I did not want to take out much from the side front panel, which would be cut in the elastic webbing.


Drafting the Pattern

Initial stages

  • Vertical lines to represent the centre front and centre back
  • Horizontal line to represent the bust
  • Horizontal line 5.5cm down to represent the underbust
  • A horizontal line 14cm down from the overbust line to represent the waistline
  • A horizontal line 10cm from the waist to represent the top hip
  • A horizontal line 20cm line down from the waist to represent the full hip.
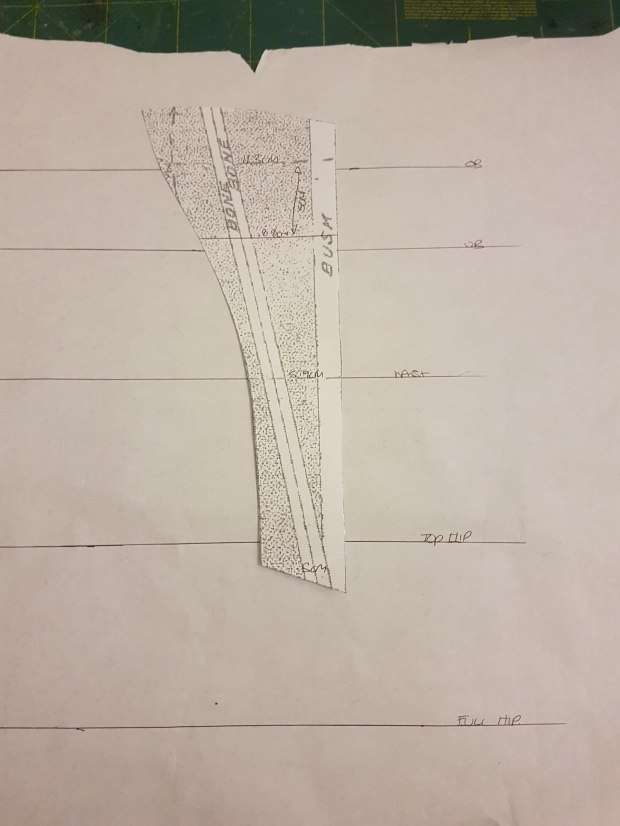
 

5.


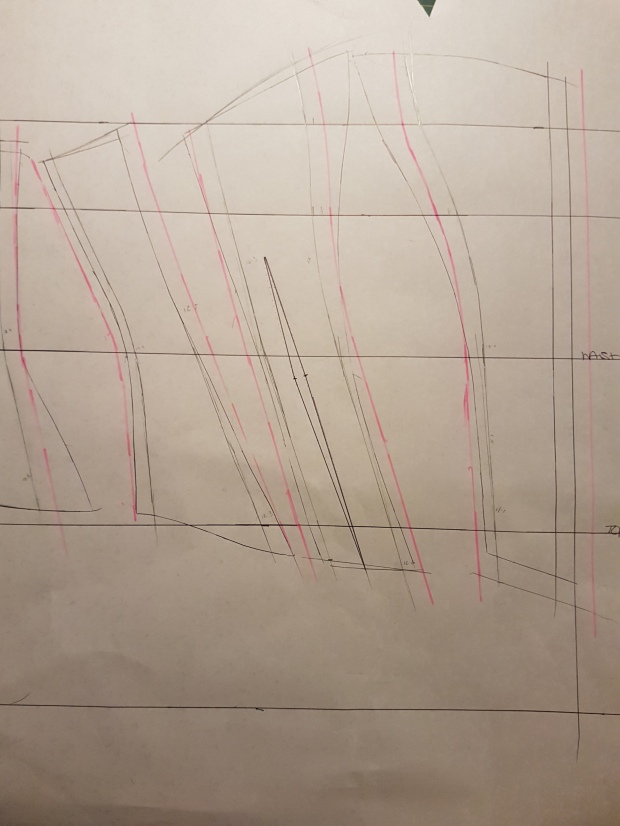
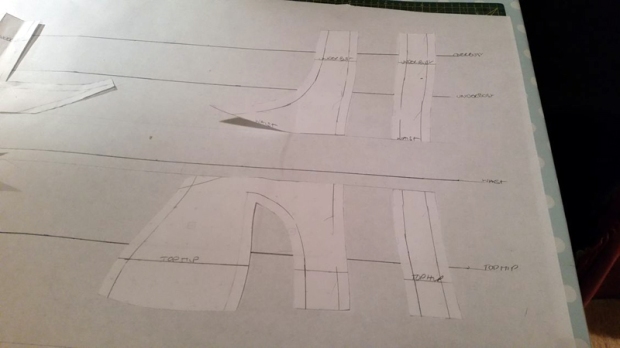
I then drew around the pieces, matching up the waist and overbust lines, lining up the centre front to the vertical line for the front.

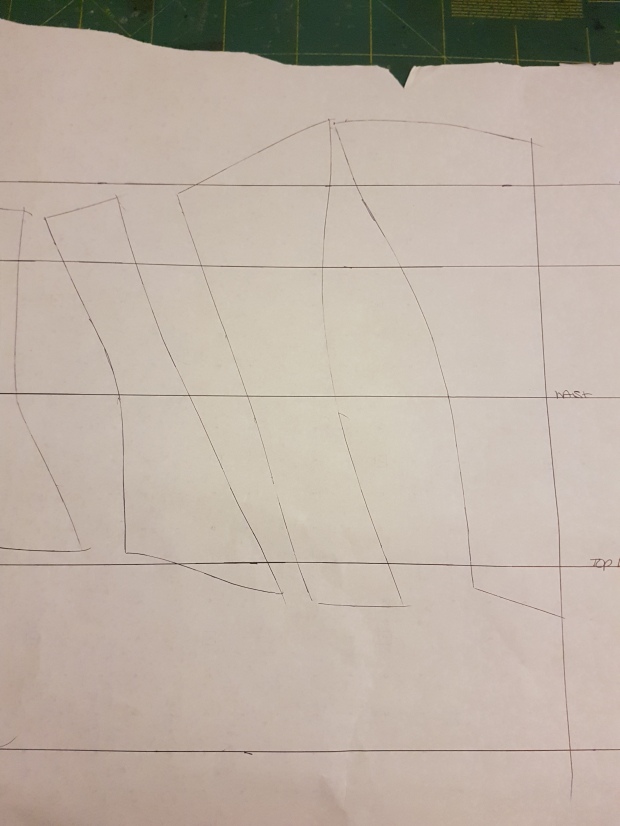
6.7.

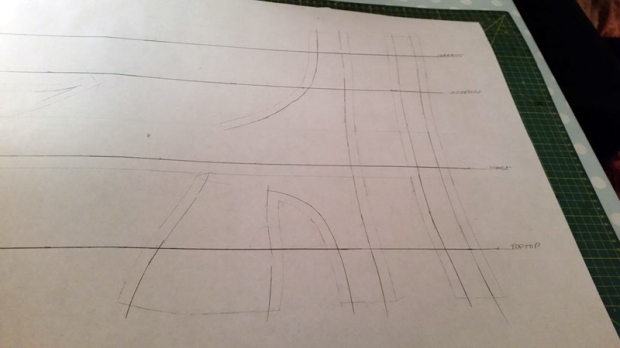
I drew in a line to represent where the busk would sit at the centre front, and also the small waist dart in the front panel. I reduced the overbust measurement first, taking most out from the centre front/front seam and spreading the remaining amount among the other pieces.
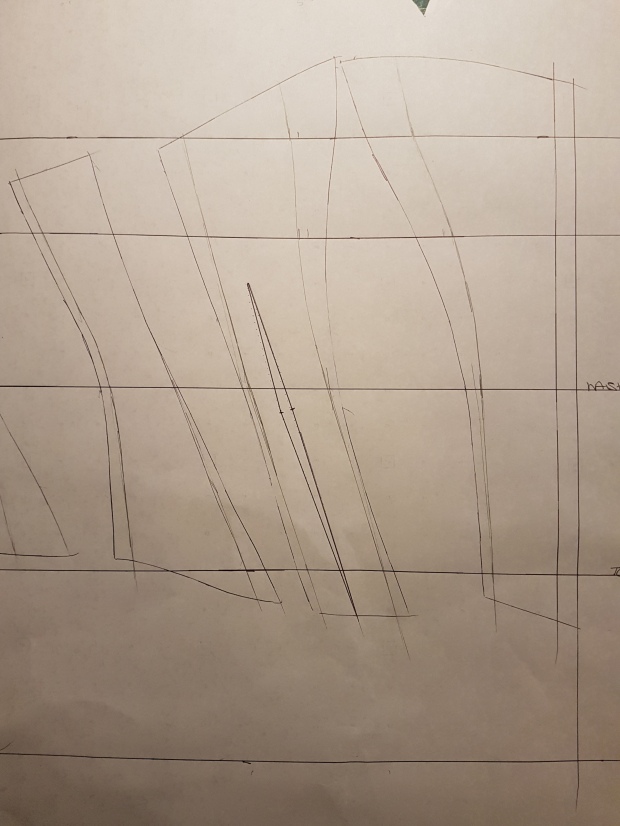
8.

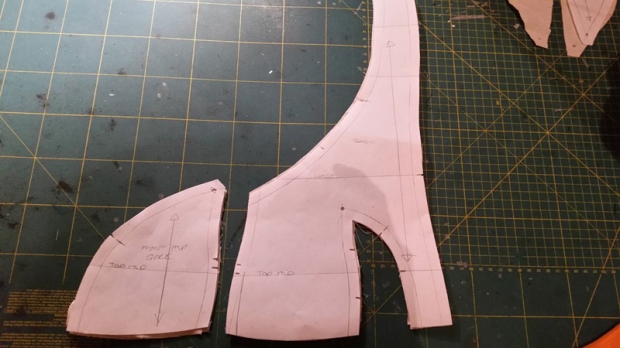
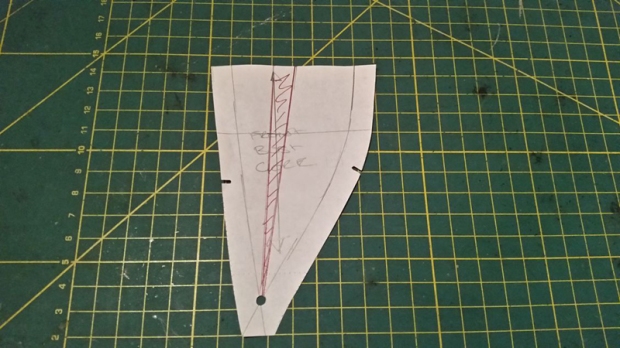
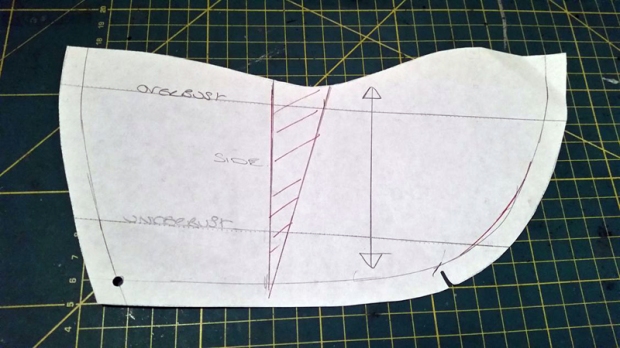
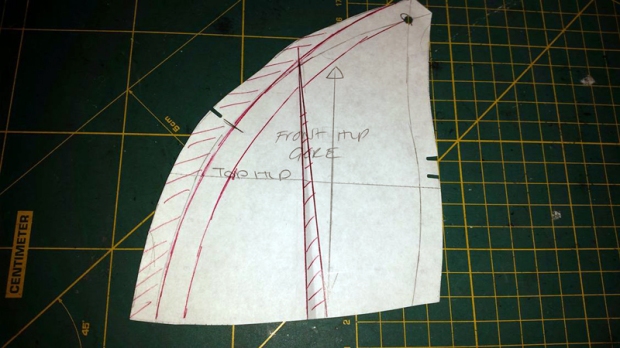
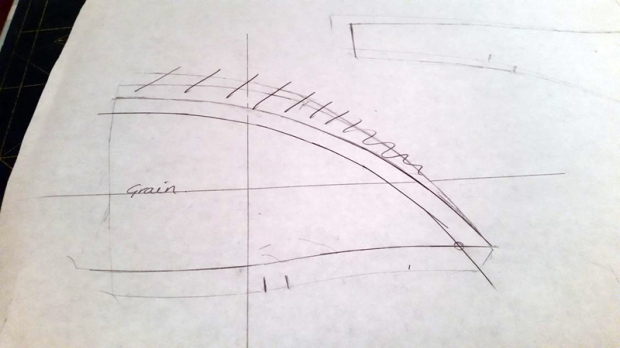
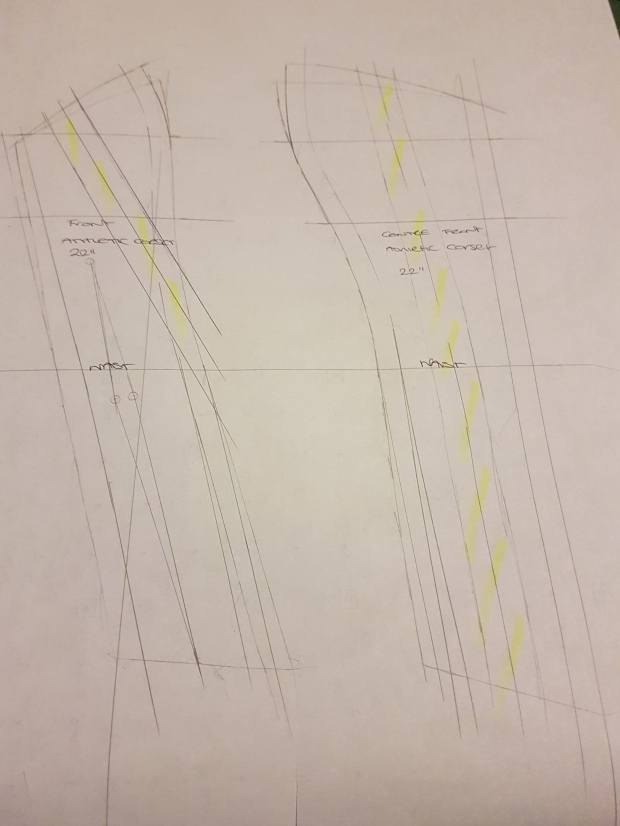
I then reworked the waist, top hip and underbust, taking out the necessary amounts. A lot of the hip adjustments were made at the side back panel. The inner lines would would be my new seam lines. I drew in lines that would form the channels in the centre back piece for the eyelets and bones, making minimal amendments to this piece. I trued the seams (checking that the seam lengths were equal) and amended them where necessary. Finally, I added the seam allowance to my finished pieces (highlighted in pink).

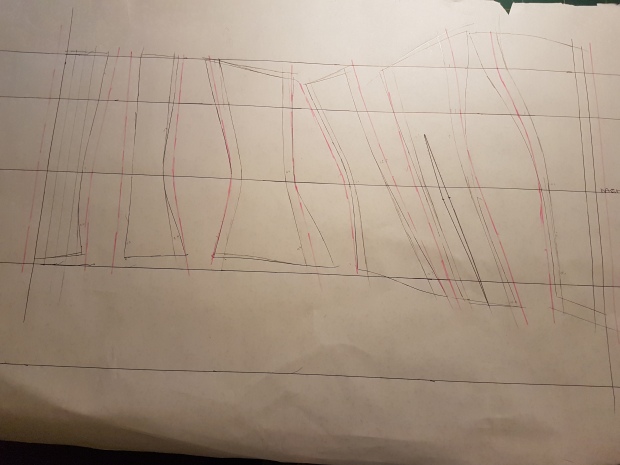
9.1011.12

Toile

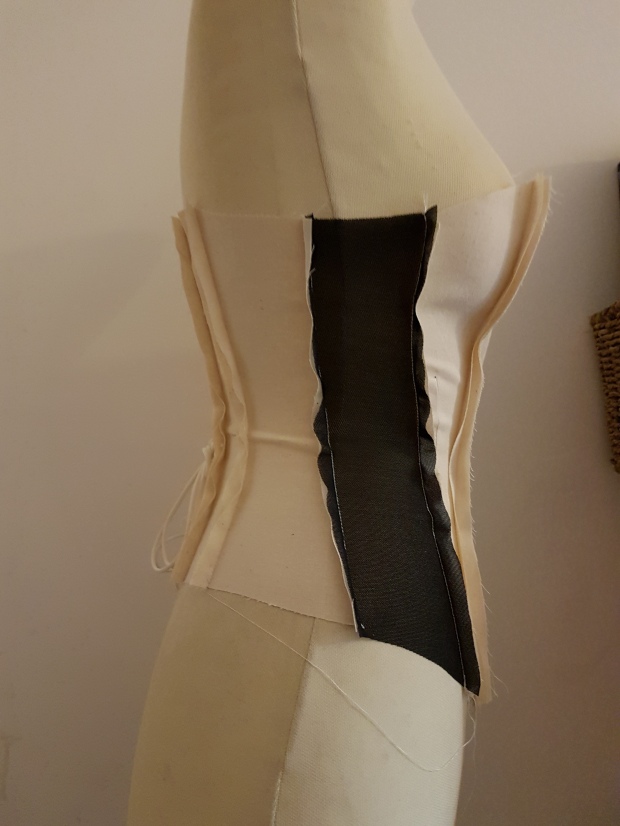
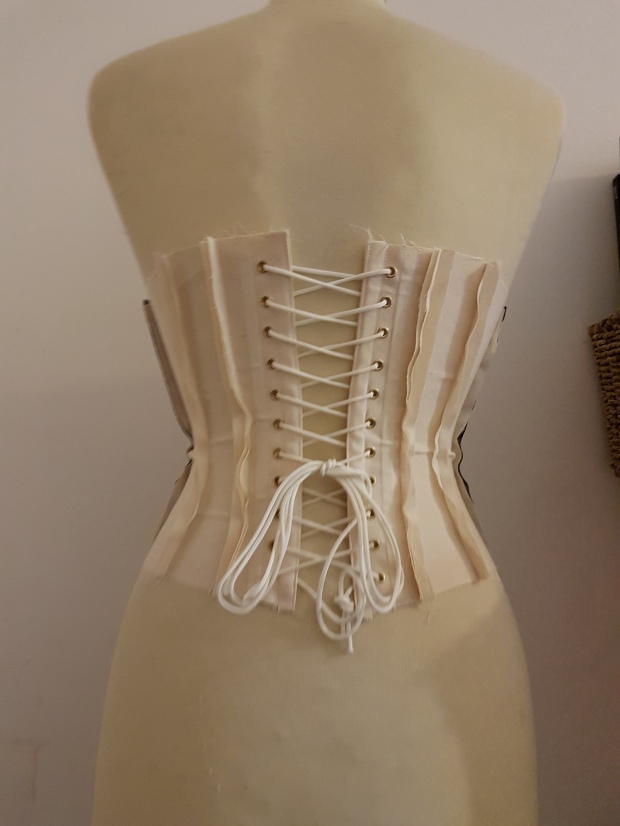
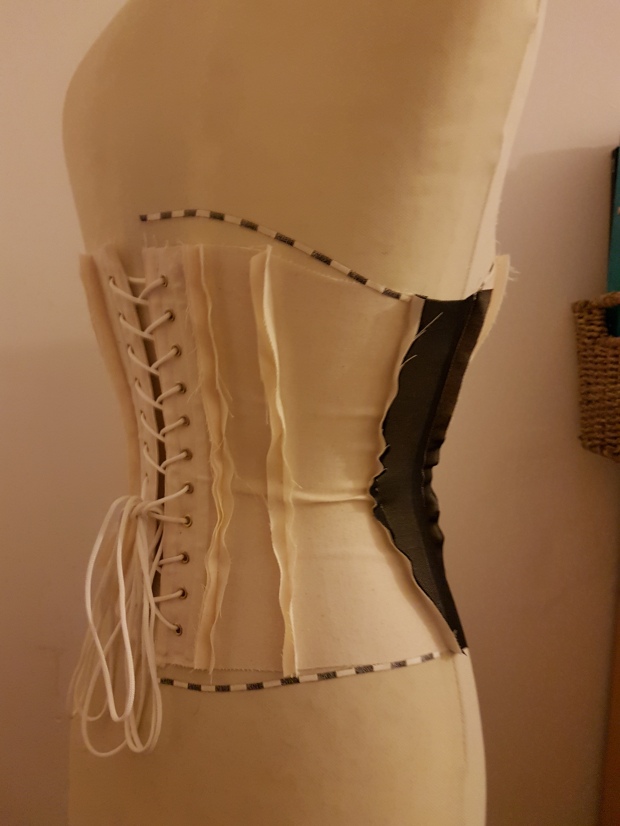
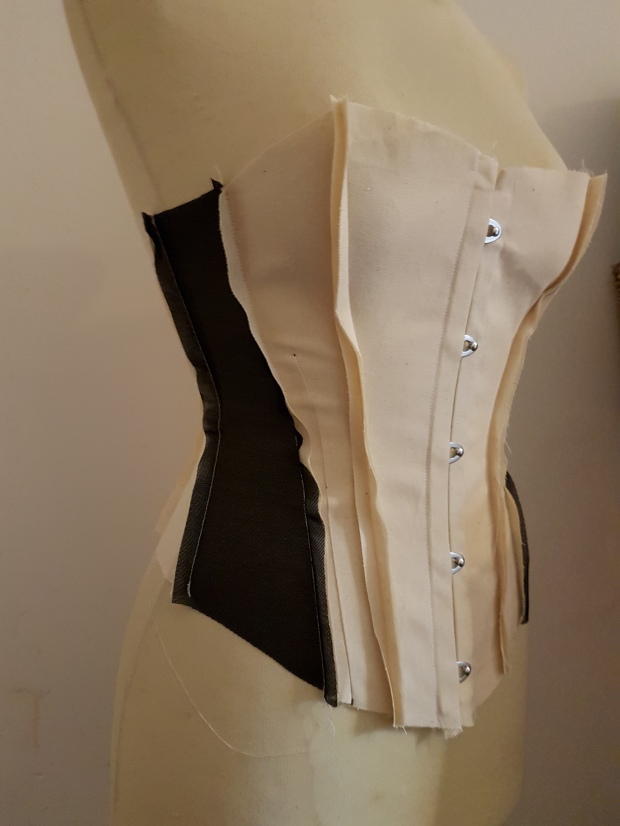
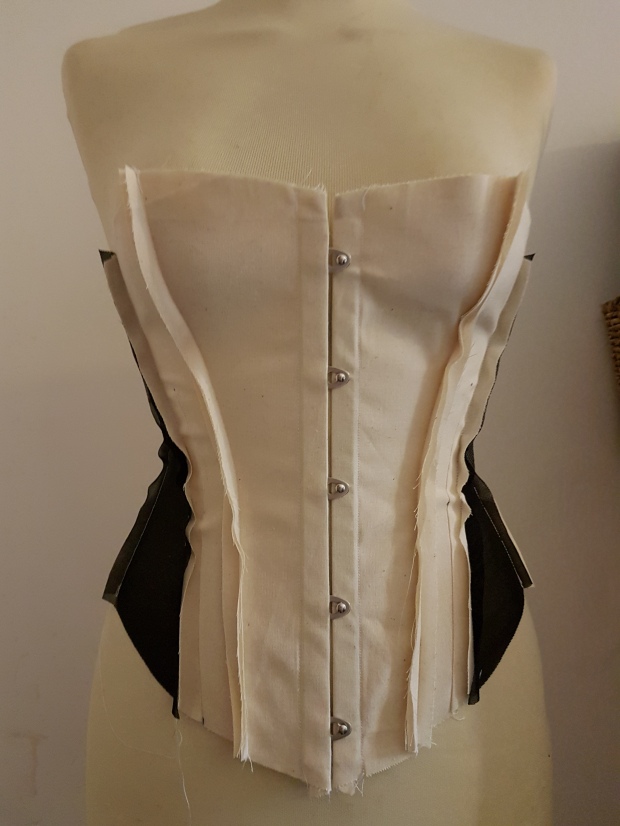
I made a simple toile of calico to test the pattern. In place of the pattern’s “elastic webbing” I used a strong powernet, which was likely to be my final fabric choice. It seemed quite a difficult fabric to source in small quantities. For the purpose of the project, powernet would have to do.

I used a very simple construction, including just the busk and the boning either side of the lacing eyelets.
13141516

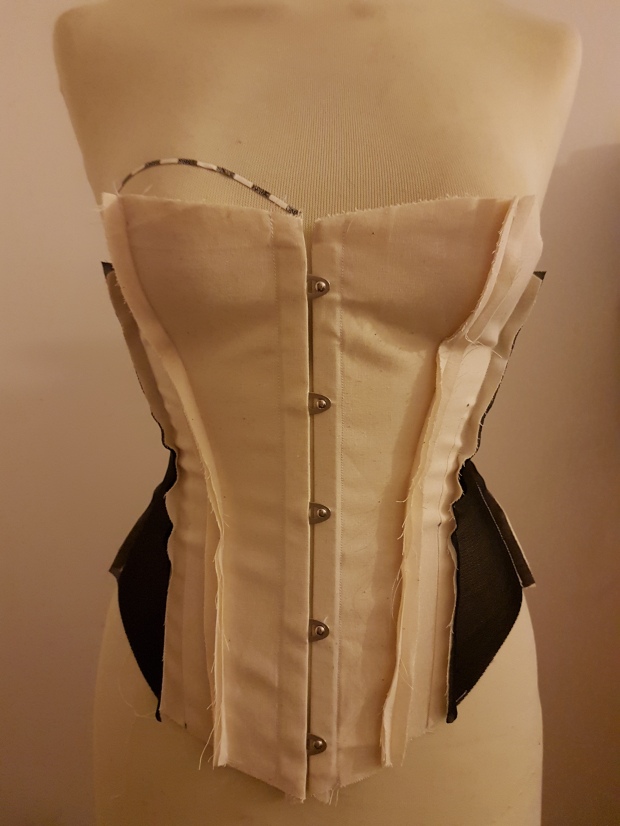
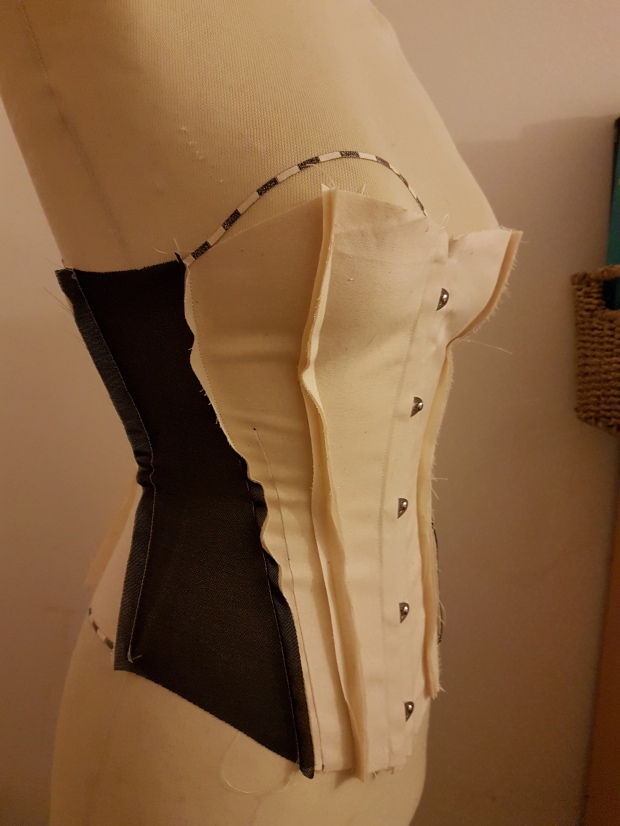
I checked the fit the corset on me before putting it on the mannequin. I was pleased with the toile, I would only have to make a few adjustments. My measurements are virtually the same as my mannequin, so for ease I marked up some of the style adjustments using fashion tape.

Although the style was low under the arm for ease of movement, I decided to add a little height to the front of the corset to give a little more coverage/modesty for the wearer. The corset did come high to the top hip and the back and the centre back depth was short. I decided to add a little to the height and drop the lower centre back, rounding the hem for a smooth curve. The elastic side panel does look a little distorted with with some with some slight pulling on the seam. This should be corrected once boning is applied in the final corset.
171819

Pattern Amendments

Center Front

  • Raise centre front/front upper seam by 1.5cm, curving to nothing at the center front.
  • Pinch 0.5cm from overbust seam to overbust point.
  • Pinch from waist to low hem by 0.5 cm, as it stands away from body.

Front

  • Raise front seam/centre front seam by 1.5cm.
  • Take out side front/front seam by 0.5cm, blending to 0cm at waist, as side front upper is distorting slightly at the seam.
  • Pinch from waist to low hem 0.5cm to bring it back toward the body.

Side Front (Powernet panel)

  • Reduce side front/front seam by 0.5cm, diminishing to 0cm at waist.
2220

Side Back

  • Raise side back/back seam by 0.5cm
  • Lower side back/back seam
  • Lower hem by 0.5cm

Back

  • Raise back/centre back by 1.5cm
  • Lower back/centre back seam lower hem by 1cm
  • Reshape for smooth curve

21

In the next article, I will use the amended pattern to construct the corset and discuss the seam methods used to piece it together.


Bibliography

Doyle, Robert. Waisted Efforts: An Illustrated Guide to Corset Making. Halifax, N.S: Sartorial Press Publications, 1997.

Steele, Valerie. The Corset: A Cultural History. New Haven: Yale University Press, 2001.


C1941/42 AVRO LACED BACK CORSET WITH BELT (UTILITY) PART 1

Summary: Avro laced back corset with belt

Maker: Avro

Model: UB902F Utility 1941/1942

Place of Origin: Britain C1941/42

Materials and Techniques: Cotton Coutil, rayon elastic inserts, metal eyelets, steel

Outer: Two part corset comprising of 5 panels either side in a single layer of coutil. It has a split front busk and lacing at the centre back supported each side with two bones of flat steel. The centre front and centre back panels are faced. Seams are backed with single casings of herringbone weave tape encasing the boning. The top and lower edges are bound in a ribbon tape.

Inner: The corset features A deep underbelt with wide elastic panels attached into the side seams of the outer corset. It features a hook and eye fastening at the front that sits directly beneath the busk.

The underbelt is constructed with a double layer of coutil which sandwiches the woven elastic panels. The additional underbelt in the garment would have been constricting, providing firm support to the abdomen and flattening the stomach.

The corset features 2 sets of 28mm suspender joining the outer and inner corsets with metal suspenders and adjusters.

21.5cm Busk

19 sets of eyelets spaced 2cm apart

Construction:

The corset is machine stitched  (13 stitches per Inch). The panels are joined together using the felled seam method encasing all the raw edge and pushing the seam toward the back. The seams have a double row of stitching. 18mm bone casings are applied to the inside of the garment. The front two bone channels do not follow the panel shape stitched down vertically instead.
The corset is boned using flat steels either side of the eyelets at the centre back and wide 9/10mm spiral steels in the bone casings. The spiral steels do not finish the entire length of the bone channel providing some ease of movement for the wearer

Dimensions

Cf depth: 34.5CM CB depth 37cm

Waist circumference 26″: Hip: 35″

Label:

UR170G, Avro Corsetry- UB902F, Laced back corset with belt, Specification 9033, Type 3, Size assortments, 26 x 32, 33 x 36

UTILITY CLOTHING

The Utility scheme was introduced toward the end of 1941 in response to the shortage of raw materials and labour for the war effort. Utility clothing was marked with the CC41 ‘controlled commodity’ mark. The mark meant the item met the governments austerity regulations and assured customers that the clothes were reasonably priced and of good quality.

The board of trade sponsored the creation of several ranges of utility clothing which were subject to austerity regulations. They restricted the amount of cloth, type of decoration and also the amount of time for manufacture. (Limitation of supplies cloth and apparel order 1941).

These restrictions also applied to the manufacture of corsetry. Steel that would have been used for corsets was used in favour for munitions. As men went to war women replaced mens roles in the the factories and the demand for practical clothing grew.

With regulations in place and CC41 marked clothing became popular skirts hems rose. Waists were nipped in conserving fabric for the war effort. Slacks were also worn made popular by the film star Katharine Hepburn. Silk and wool were highly uncommon. Silk was used for parachutes and wool for soldiers blankets. Cotton was also rationed though not so heavily. Rayon became the number one choice of fabric for the 40’s as it was readily available and relatively inexpensive.

To further economise, the Making of Civilian Clothing (restriction orders) was passed in 1942. This forbade wasteful cutting of clothes and set list of restrictions that Tailors and dressmakers had to work to. For example, dresses could have no more than 2 pockets, 5 buttons, 6 seams in a skirt, 2 inverted or box pleats or 4 knife pleats and no more than 4 metres of stitching. No unnecessary decoration was allowed.

The term ‘Utility’ became synonymous with austerity shortages and rationing.

(1900-1910) CORSET ADVERTISEMENT: ROYAL WORCESTER & BON TON CORSETS

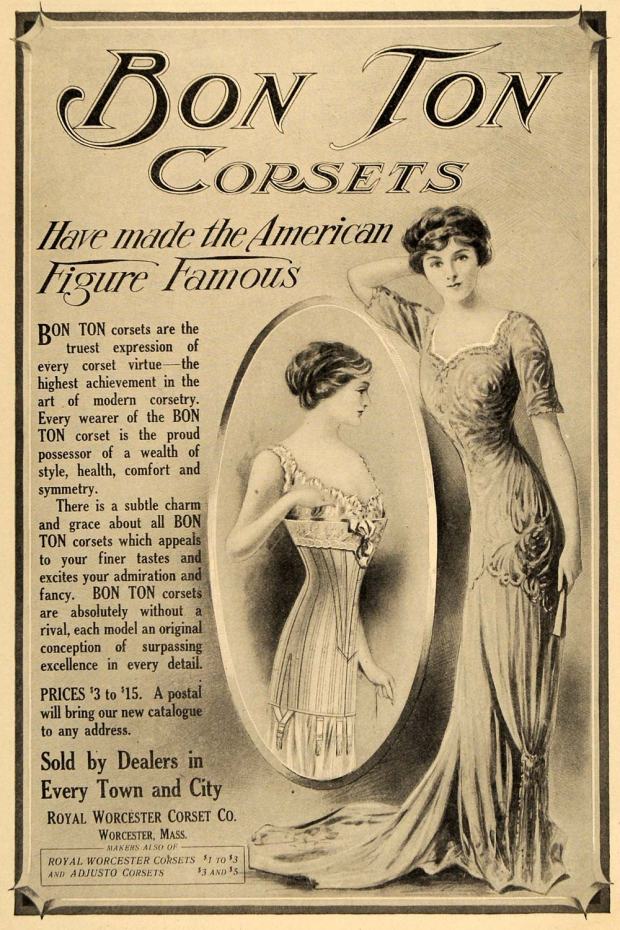
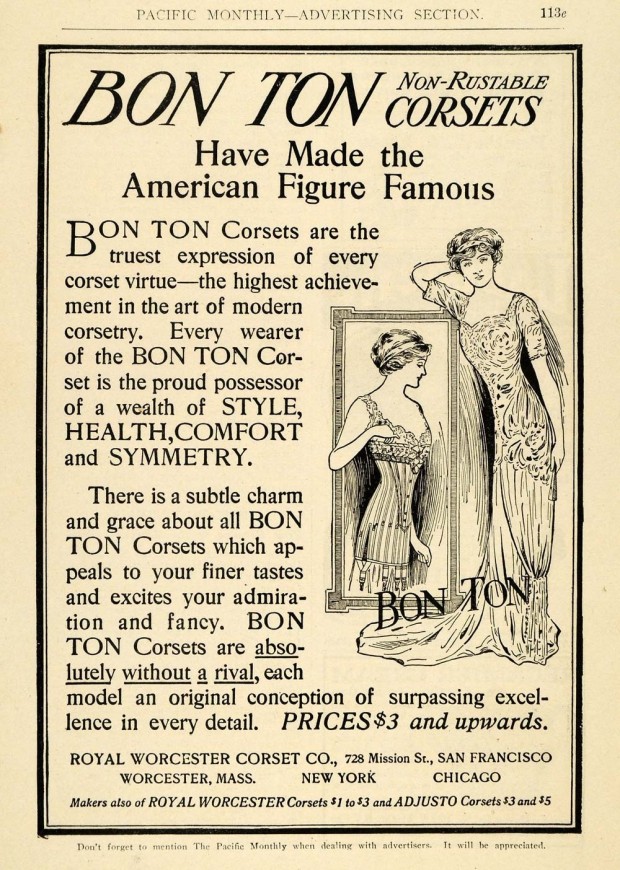
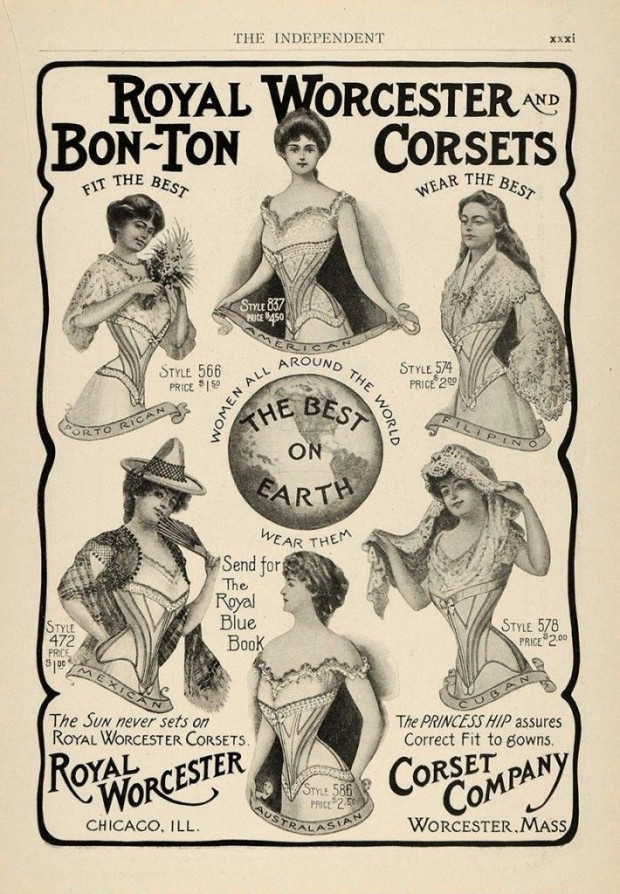
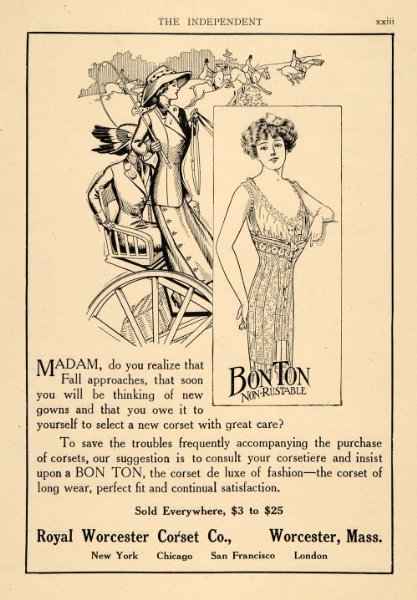
Corset adverts are a great visual source for understanding the corset silhouette and individual panel shapes that are often hard to determine in garment photographs.

The Royal Worcester Corset company of Worcester Massachusetts was established in 1861 by David Hale Fanning and flourished until his death in 1926. The company carried on and later in 1949 dropped the word ‘corset’ from its name and became the Royal Worcester Company.

The company were makers of the famous Bon Ton, Royal Worcester and Adjusto corsets understanding that women required different styles depending on body frame.

The following adverts and illustrations are for the Bon Ton range.

IMG_6677

“BON TON corsets are the truest expression of every corset virtue- the highest achievement in the art of modern corsetry. Every wearer of the BON TON corset is the proud possessor of a wealth of style, health, comfort and symmetry.”

63a6dd71e3b207aafb9a706e9c36c271

IMG_6678

“THE PRINCESS HIP: Assures correct fit in gowning giving also grace and comfort

DOWAGER Style 600: The only corset made that will properly reduce stout figures to correct proportions”

740fee89b9d6ff719aeb717ba5266973

IMG_6675

Further Information

D.H Fanning corset patent No 208517 date 1878 here.

D. H Fanning corset patent No USRE8663 Date 1879 here.

(1895- 1910) CORSET ADVERTISEMENT: FERRIS BROS. ATHLETIC WAIST & BICYCLE CORSET WAIST

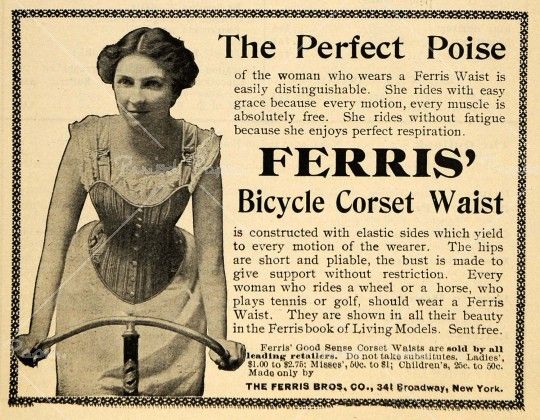
I often refer to old corset advertisements for information on shape or fit of a corset. I am currently writing an article on the ‘Athletic Corset’ so thought I would share some designed by The Ferris Bros Company (established in 1878) for their Athletic and Bicycle corset waist styles.

As physical exercise became more popular amongst woman in the 1890’s, corsets were adapted to allow the wearer freedom of movement and ‘promote healthy respiration’.

bicyle-corset-waist

“THE PERFECT POISE of the woman who wears a Ferris waist is easily distinguishable. She rides with easy grace because every motion, every muscle is absolutely free. She rides without Fatigue because she enjoys perfect respiration. 

FERRIS BICYCLE CORSET WAIST is constructed with elastic sides which yield to every motion of the wearer. The hips are short and pliable, the bust is made to give support without restriction. Every woman who rides a wheel or a horse, who plays tennis or golf should wear a Ferris Waist. They are shown in all their beauty in the Ferris Living Models. Sent Free.”


1897-ferris-good-sense-bicycle-waist

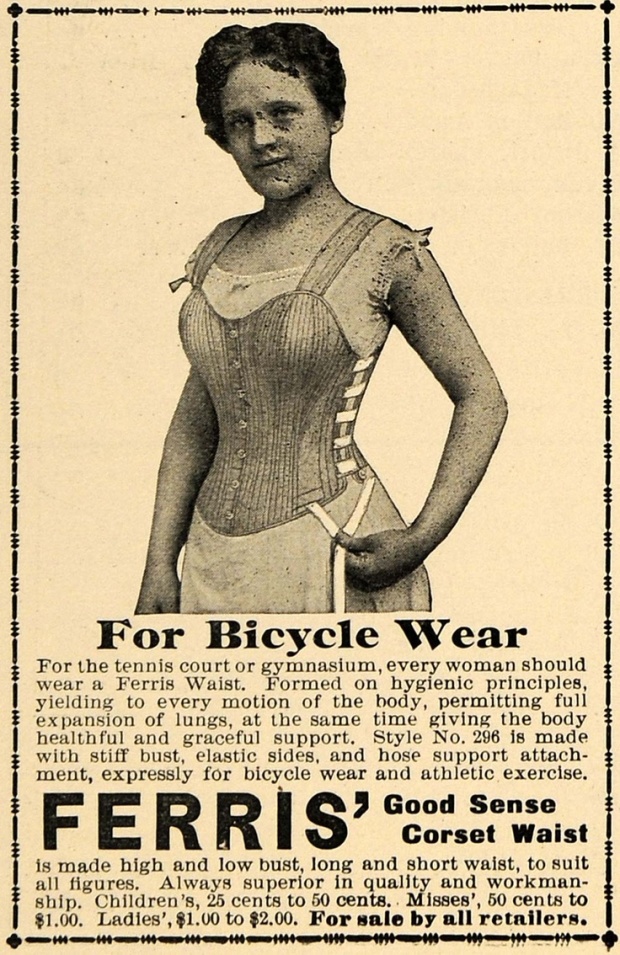
1897- FERRIS GOOD SENSE CORSET WAIST FOR BICYCLE WEAR

“FOR BICYCLE WEAR- For the tennis court of gymnasium, every woman should wear a Ferris Waist. Formed on hygienic principles yielding to every motion of the body, permitting full expansion of the lungs, at the same time giving the body healthful and graceful support. Style No. 296 is made with stiff bust, elastic sides and hose support attachment, expressly for bicycle wear and athletic exercise.

FERRIS GOOD SENSE CORSET WAIST is made high and low bust, long and short waist to suit all figures. always superior in quality and workmanship. Children’s 25 cents to 50 cents. Misses’ 50 cents to $1.00. Ladies $1.00 to $2.00. For Sale by all retailers.”


ferris-athletic-corset-waist

1902- FERRIS ATHLETIC  CORSET WAIST

“FERRIS ATHLETIC CORSET WAIST is especially designed for women who enjoy outdoor sports. Faultless in outline, it meets every requirement of fashionable dress and yet there is neither restraint nor pressure. Elastic bands at the sides yield to every breath and movement: Comfortable shoulder straps support the bust in any position and keep the shoulders from drooping.

FERRIS ATHLETIC WAIST is the most healthful, restful, graceful, garment a woman ever wore.”


813b7e3ea93c4ed559ccd3f96d7b5de3

1908- FERRIS ATHLETIC WAIST- ADVERT PUBLISHED IN GOOD HOUSEKEEPING

STYLE 262

“ACTIVE WOMEN- Body-activity requires limb-freedom, breathing room and growing room. Hence the FERRIS ATHLETIC WAIST is a perfect garment for active women. Without binding or constricting it gently yet firmly supports and molds the body, permitting exercise and unusual freedom of movement”


1903-good-sense-athletic-waist-ferris

1903- FERRIS GOOD SENSE ATHLETIC WAIST

STYLE 261

“THE OUTLINE OF HEALTH- There is an old fashioned notion that an athletic waist is ugly. this perhaps is the reason so many woman still embrace the torture of health destroying corsets. they do not know the principles  of the FERRIS GOOD SENSE ATHLETIC WAIST

The above illustration is a photographic reproduction. note the lines of beauty. see the elastic expansion on the side that allows the waist to breathe when you do, that permits you to turn and bend and swing with perfect ease an grace”


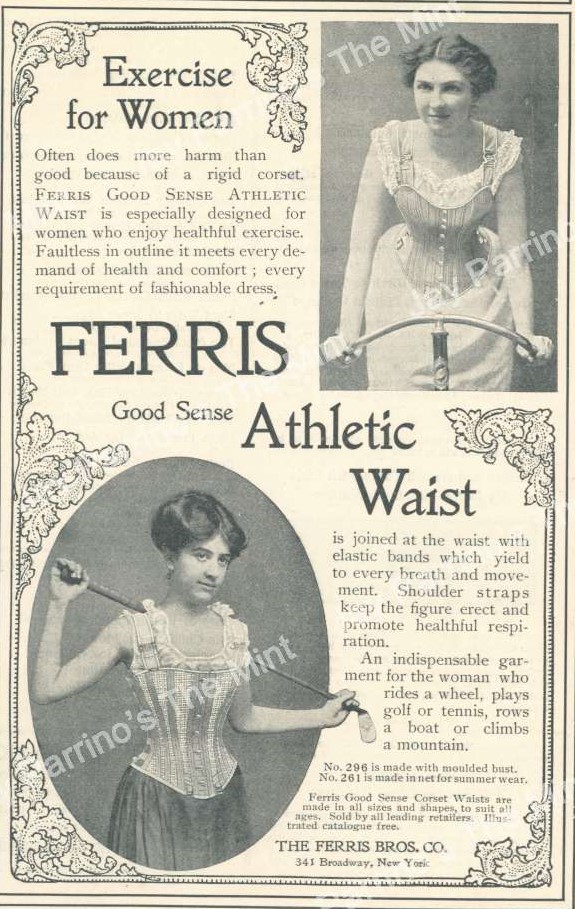
ferris-corset-good-sense-athletic-waist-1901

1901- FERRIS CORSET GOOD SENSE  ATHLETIC WAIST 

EXERCISE FOR WOMEN often does more harm than good because of a rigid corset. Ferris good sense athletic waist is especially designed for women who enjoy healthful excercise. Faultless in outline it meets every demand of health and comfort, every demand of fashionable dress.

is joined at the waist with elastic bands which yield to every breathe and movement. shoulder straps keep the figure erect and promote healthful respiration.
An indispensable garment for the woman who rides a wheel, plays golf or tennis, rows a boat or climbs a mountain

http://www.ebay.com/itm/AKH-410-Antique-Print-1901-Ferris-Good-Sense-Athletic-Waist-Advertisement-/351898323221?hash=item51eec64915:g:1UwAAOSwMVdYHp9m


<a href=”http://www.bloglovin.com/blog/14331383/?claim=qjpg88ctuex”>Follow my blog with Bloglovin</a>


1887 B BALDWIN PATENT 358249: PART 1

NOTE  *This article was orginally published January 2015 for Foundations Revealed. The link can be found here*

1887 B Baldwin Patent: Corset and method of making the same

This is the first part of a two-part series discussing B Baldwin’s 1887 patent 358249. This article will discuss the patent, it’s pattern and how it was created whereas the second will focus on recreating the corset and my methods used in its construction.

When I first saw this patent I was immediately attracted to the unusual paneling and the wonderful shapes the lines created. Personally I love corsets which have a focus on the waist section, such as some of the ventilated styles as opposed to your typical Victorian style with their up and down straight panels. I thought I could have some fun playing with color when recreating the pattern for the final corset.

As I’ve not before incorporated gores/gussets within a corset pattern before I knew this would also be a personal challenge. As someone with a petite frame and from a pattern cutters point of view I’ve associated gores and gussets with adding capacity and support for the more curvier figure. From a construction angle I must admit so far I’ve always avoided them as I knew it would be challenging to insert, particularly sewing round the corner at the apex of the gore. This patent would definitely be a learning curve both pattern wise and testing my sewing ability.

The Patent

The patent is comprised of two main parts, the first illustrates the corset and it’s parts- drawings of the pieces and the second is the specification that forms the letters of the patent declaring the description of the invention. The patent can be found here.

Baldwin’ patent relates invention of new improvements in corsets. As stated in the letters, Baldwin’s patent relates to the manufacture of corsets and its general object to Simplify and improve their construction. This could be accomplished by ‘so shaping the pieces of which each half of the corset is composed’

Part A shows two figures as seen below:

1

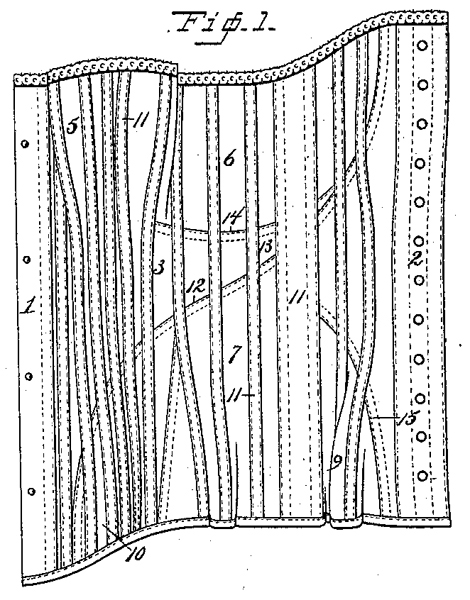
FIGURE 1 shows a completed half corset with all the stitching detail demonstrating the contruction in line with the written description

2FIGURE 2 is a general view showing an outline of the pieces of which the half corset is composed.
Patent Observations

  • The pattern was made up of 16 pieces (8 per half) it featured both hip and bust gores.
  • Straight front busk used. No indication of depth of centre front given so length would be determined later on.
  • The main body of the corset was made up of 4 pieces. I’ll rename the pieces as follows for the remainder of the article which will make it easier to distinguish than the numbers of the pieces in the patent (which in my opinion) were oddly marked Centre front (1), – – Front (3), Back (7), Centre back (2).
  • The gores would also be referred to as Front bust gore (5) back bust gore (6) front hip gore (10) back hip gore (9).

Centre Front- The centre front was a straight strip piece to which the front was joined. The front seam of the FRONT Panel was curved which would give some curve to the corset over the abdomen region.

Front- As indicated on the drawing Point 4 denotes a slit cut into the pattern which would be opened out to insert the FRONT BUST GORE. The BACK BUST gore would also be partially joined.

Back- Would feature a cut away section which would be opened out slightly when inserting the BACK HIP GORE. This piece would also join to the FRONT HIP GORE creating that S bend curve.

Centre Back The centre back was a curved piece which would help curve the corset inward following the curvature of the spine. I did initially wonder at this point how the seam would be boned.

Object of the Patent

Relates to the manufacture of corsets, and has for its general object to simplify and improve their construction’ this would be achieved by the patent pattern lessening the number of seams in the garment.The essential principle being that the front and back body-sections are joined by a single curved and recurved seam, which follows naturally the curves of the body from between the shoulder blades at the back of the corset down across the waist and around the front of the hip to the bottom of the corset at the front. In doing so the corset will closely naturally to the figureThe corset will conform to the curves of the figure without the necessity of pressing or forming it into shape.There being no special pressure or tightness at any of the seams or at any portion of the corset.Baldwin also states in his letters that completed corset when drawn tightly around the figure ‘bring an embodiment both of Hogarth’s ‘Line of Beauty’ and the Grecian line of Grace. This would be achieved via the corsets construction and Baldwin’s principle of the front and back sections being joined by a single curve. I decided to do a little bit of research.

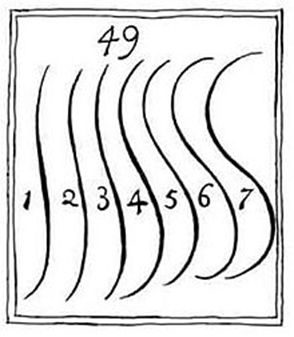
Hogarth’s Line of Beauty

3

The line of Beauty is a theory in art or aesthetics used to describe an S-shaped curved line (a serpentine line) within an object.

The theory originates with William Hogarth and is an essential part of his theory of aesthetics as described in his Analysis of Beauty from 1753. According to his theory it is to be observed that straight lines vary only in length and therefore are left ornamental. Curved shaped curved lines signify liveliness and can vary in their degree of curvature as well as length.

This theory can be seen with the curved and recurved seam taken from Baldwin’s notes commencing from the bottom the seam first joins the back edge of the front body section and the front edge of the front hip gore. This seam passes along the rearwardly extending tongue of the front body section and joins that to the front of the back body section. It then passes of from the tongue and joins the back of the underarm section to the front of the back body section.

Initial Thoughts

When I first looked at the drawing of the corset I found it a little intimidating to envisage how the pieces would come together for the finished garments especially with the external bone casings providing the structure. I wanted to be clear on its construction and how it was intended to fit the body before I adapted the pattern to my own measurements

I therefore decided to do some further research into some of the history of the time. Moreover look at some of the corsets from this time and the assignor to Thomson, Langdon & CO.

History

The patent was assigned by Thomson – presumably Thomson, Langdon & Co. (American, founded 1865) was probably most known for his glove fitting style corsets. The illustrations below are actually of a later date so maybe this corset patent of 1887 as a fore runner to the later styles. The Foundations Revealed article by Marion McNealy provided a lovely timeline of the styles.

4

5

Corsets of 1887

I also used The Metropolitan Museum in New York online site for some visual sources of actual corsets from this period for inspiration on fit, colour and fabric. For anyone that is not familiar it’s well worth a look. Admittedly I did spend quite a while looking up corsets from this period but will just include a couple for the sake of the article.

CI46.27.6_F

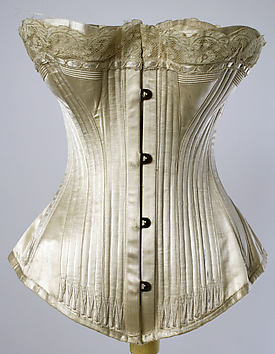
Ivory Silk Corset dated 1887 – Made of ivory silk the corset featured a front bust gusset. (Laura Loft has a useful article discussing gores and gussets). The article describes as a piece inserted between 2 panels and a gore being a panel inserted into a slit which was opened out during manufacture. The corset has a straight upper edge with a deep lace trim. The external bone casing were positioned close together at the centre front providing lots of support to the abdomen.

50.105.41_front_CP4

American corset dated between 1885-1887. Another corset featuring a gusset instead of a gore. I wondered whether this technique was used often. Gores would certainly be harder to insert pivoting the apex around the slit. The corsets of this time seemed to be cut quite low and straight over the bust perhaps keeping level with the overbust line. I also noticed that the corset lower edge sits high up on hip and featured a smooth dipping curve to the CF.

Planning Stages

My body frame is quite small so I was interested in whether the hip and bust gores would really work for me. Typically they provide capacity in these areas but being quite petite I wondered whether they would be too much and I would have to reduce them right down. Was there any point in making this corset for me? Or should I find someone of a more curvier figure. While I’m probably not the right figure for this style, never the less it would be interesting to see how this style of pattern would fit a small frame.

Things to consider – The sketches of the patents pieces would not be accurate scaled versions of the final corset. I would work with them loosely but would provide a good starting point for piecing together and seeing how the corset fitted together.

Observation – I would probably add some height into the bust gores as they came under the over bust line to make it more wearable for the modern day wearer me who wouldn’t be wearing it as an outer corset as opposed to undergarment

Measurements

Usually I work to a 2 inch reduction throughout my corset patterns for bust, waist and hips. However as the patent stated ‘The corset will conform to the curves of the figure without the necessity  of pressing or forming it into shape’. I Decided on a 5cm/ 2″ reduction of the waist with less on the upper body and none on the lower body. I would still have some defintition of the waist without the corset being too constrictive.

Measurements

  • Overbust: 76.5cm
  • Underbust: 69cm
  • Waist: 64cm
  • Top hip: 79.5cm
  • Full hip: 86 cm
  • Over bust to underbust: 6.5cm
  • Underbust to waist: 12cm
  • Point of bust (POB to POB) 18cm
  • Waist to top hip: 10cm
  • Waist to full hip: 20cm

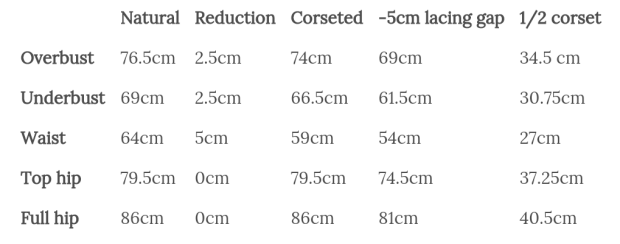
I then made a table to work out my corseted measurements:

Screenshot_2016-02-21-19-07-49-1

Approach to the pattern

Baring in mind the patent was only an indication of the pattern pieces and not actually a pattern itself to adapt, I decided before working to any measurements to piece together the patent to get a 3rd visual idea of the pattern. This would help determine grain lines of the pieces as well.

As a commercial pattern cutter (my day job) I was fortunate enough for the purpose of this challenge to have access to a large scale plotter. Yay- this would save the time of lots of cutting and sticking.

I enlarged the patent to 600% a rough guess of the scale as a starting point. (on a side note the diagram was also printed out and proved most useful as a visual aid for how the panels were joined shown later on and for the bone placement.

I cut out and carefully pinned together the pieces of the patent in order to get a 3D impression of how the corset would shape to the body. The hip and bust gores gave a lot of shape and curve emphasis as noted by Baldwin in his patent. I found that the centre front and front panels gave the corset quite a curve over the abdomen demonstrate which could be seen on some of the images previously mentioned above. The curve was quite flattering and worn would smooth over the stomach area.

NOTE: I compared the 600% scaled version to my measurements and found they were way out. I repeated the exercise printing out the pieces to 500%. I intended on working with something slightly closer to my corseted measurements as a starting point.

Drafting the pattern

First, I used spot and cross paper (on the reverse), a method I use at work. I’m able to still see the faint markings from the reverse as a guide but don’t find it so distracting when working with small increments in the adjustment stage.

14

My first aim was to ensure the lines representing the overbust, underbust, waist, top hip and full hip were spaced according to my measurements. I lined up the waist on the scaled up patent pieces which I had gauged when it was placed on the mannequin on the main pieces now renamed CF, FRONT, BACK and CB and drew around.

15

I realised straight away that the position for the bust gore was in totally the wrong place in comparison to what my measurements said. This could be due to a couple of reasons. The main and probably most likely was the scale at which the pieces were enlarged by. Realistically to get a truer size the patent probably should have been enlarged somewhere between the 500 and 600 %. Also quickly comparing my measurement to that of my mannequin I realised that the length of my body between the underbust line and waist was greater. I decided that the next step would be extending the pattern at the waist so all the pieces lined up with the critical horizontal measurements axis.

1617

At this point I realised I most likely would make a couple of toiles. Working from a patent I wanted to get a feel for the corsets construction and it’s intended look. It was crucial that the pattern maintained the S bend curve through from the front and back. As I would be cutting right through the waist to extend the upper section of the pattern I would have to reshape the curved line.

At this point I decided I would ignore all the other measurements around the body and work first on the depth adding a total of 6.5 throughout the garment. I determined from piecing together the patent that the seam allowance included was roughly around 10mm. This was marked in to to avoid confusion. I carefully traced around the pattern ensuring that I marked in all the horizontal lines which would help repository the pieces. After some consideration I decided that I would add 5cm depth between the underbust and waist. Looking at where the hip gore started I decided also to drop from the waist to the top hip by 1.5cm

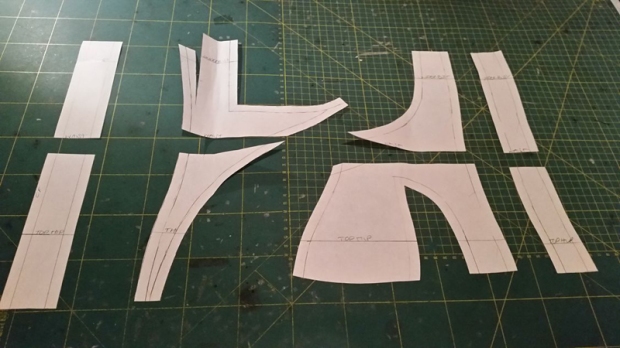
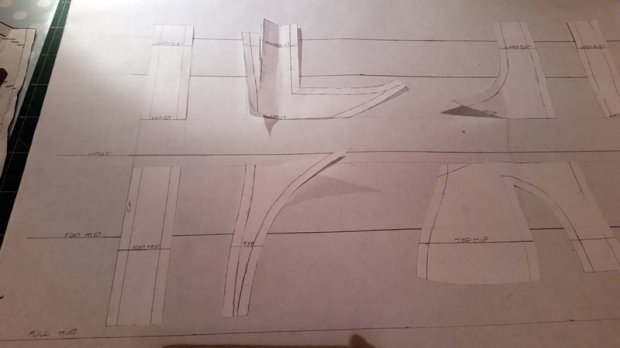
On the CF, FRONT, BACK, CB pieces I cut along the waist line

1819-1

On a fresh sheet I marked in the waist position, I faintly marked lines 5cm above and 1.5cm below which would be my guide for repositioning the flat pieces. I drew around the pieces aligning them vertically. The centre front and centre back I simply filled in the gaps.

20-121-1

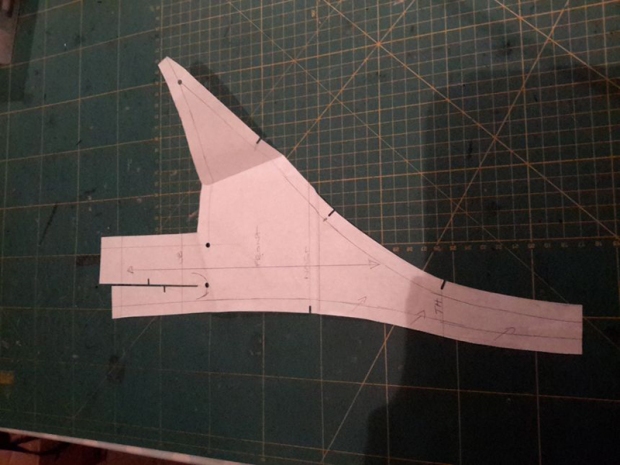
The front and back sections were more difficult and it took a couple of attempts to get the right shape curves. At this point I had to use the front hip gore to check my seam measurements were correct for the main curve that joined the front and back. This was probably the hardest part as the seam ran through so many pieces.

22-123-1

At this stage I also ensured that all the other seams aligned correctly before making my first toile.

Toile 1

Observations

  • Hip gores start too low
  • Too much bulge over abdomen
  • Excess fabric over hip
  • Excess fabric over bust

Toile amendments (work on the half)

  1. Raise waist line up by 1cm on all pieces ( which would lift up the hip gussets)
  2. Bust gore: pinch out 1cm24
  3. Side bust gusset: panel pinch out 3 cm. Reshape upper edge. Reshape curve toward back to flatten it. Initially I was going to take the 3 cm from the centre of the piece but realised I would have too much of an angle at the centre point. Instead I took out 3 x 1cm equally spaced throughout the piece.25
  4. Front hip gusset:. pinch out 1cm from centre lower edge to 0 at upper edge . Then reduce lower edge by 1cm reshaping main S bend curve.26-127-1
  5. Front: Pivot pattern piece from waist down to move the seam over by 1cm this will eliminate some of the bulging over the abdomen. Pinch out 0.5m from main A bend curve at waist.28-1
  6. Back: Pinch out 1.5cm from lower edge over hip.29-1
  7.  Back hip gore: Pinch out 2.5cm from lower edge

Toile 2

For the second toile I considered construction methods and tested out how the final corset would be pieced together, this time also including the double stitching line and bone pockets.

For the boning I used a combination of spiral and flat steel bones. The flat steels were only used in the centre back panels to provide support either side of the eyelets. The Flexible steel was inserted into external Bone casings. This adds support but also allows for flexibility

Observation: This toile also allowed me to determine their placement. As I had taken out a fair amount of room over the hips I may not be able to use as many channels as were illustrated in the patent sketch.

Busk: I had determined that I would use a 14″ busk for the final corset. However for the sake of this toile I used something slightly shorter as my supplies were yet to arrive.